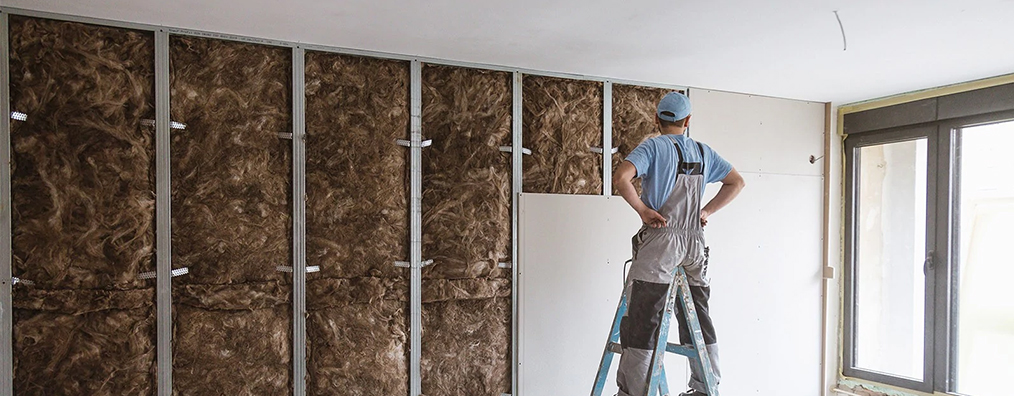
Are you planning on installing or repairing drywall by yourself? If you are looking for ways to skip hiring a drywall repair service in Washington, then it is important for you to have some prior knowledge of the project.

Installing drywall by yourself can be a difficult task, especially for those with little to no prior experience. However, with the right guidance and some patience, you can achieve a professional-looking finish that adds beauty and functionality to your space. 

Below are the seven essential tips that will help you successfully install drywall by yourself and attain that polished, seamless appearance offered by professional drywall installers.

1. Gather the Necessary Tools and Materials

Before you begin the installation process, it is crucial to gather all the tools and materials required. It will help you get a professional finish to your work and also get your work done in a much quicker time. The things you may need are:

  • Drywall sheets
  • Drywall screws
  • Drywall joint compound
  • Joint tape
  • T-square
  • Utility knife
  • Drywall saw
  • Sanding tools
  • Safety gear

2. Measure and Plan Your Layout

After collecting all the needed materials, start by measuring the walls and ceilings where you intend to install drywall. Plan the layout to minimize the number of seams and joints. 

While seams are inevitable, fewer joints will result in a cleaner, more professional appearance. You might also want to consider the positioning of electrical outlets, switches, and any other fixtures that will require cutouts in the drywall.

3. Cut Drywall Sheets Accurately

Using a T-square and utility knife, mark and cut the drywall sheets to precisely fit the dimensions of your walls and ceilings. Make sure that the cuts are clean and straight to minimize gaps and uneven seams. When cutting holes for outlets and switches, make careful, precise cuts to avoid unaligned spaces in the walls.

4. Secure Drywall Sheets with Proper Fasteners

Attach the drywall sheets to the wall or ceiling studs using drywall screws. Place the screws every 12 to 16 inches along the studs and ensure they are countersunk slightly below the surface. Overdriven or underdriven screws can cause bulges or depressions in the drywall.

5. Tape and Mud the Seams

You can apply joint tape over the seams and cover it with a layer of joint compound to create a seamless joint. Use a trowel to smooth the edges of the mud, blending it with the surrounding drywall. Make sure to give it time to dry completely before sanding.

6. Sand Smoothly and Feather the Edges

Sanding is a crucial step in achieving a professional finish. Use a sanding block or orbital sander to smooth out any imperfections in the joint compound. Feather the edges to create a gradual transition between the compound and the drywall surface. 

7. Prime and Paint for a Finished Look

Once your drywall installation is smooth and seamless, it is time to prime and paint. Apply a coat of primer to ensure the paint adheres properly, then follow with your chosen paint color. Take your time with the painting process, using a roller or brush to achieve an even and professional finish.

Still Not Sure? Want To Hire a Professional?

Although by following these tips, you can successfully install drywall by yourself and achieve a professional finish, but if you are still not sure and want to hire drywall repair company in Washington DC, then there are many options available, such as EZ service. 

You can also look for other professional drywall installers and find the best solution for your drywall installation and repairs. Or you can contact us now for expert advice according to your project requirements.

About The Author

sidebar-cta-repairs
sidebar-cta-careplan
sidebar-cta-installations

Comments

More Posts You May Find Interesting