
What You Need to Know About Patching Holes in Drywall?
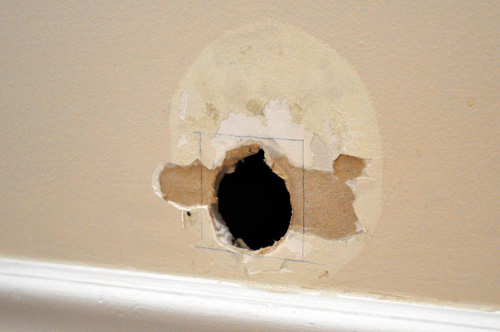
Do you know the size of holes in drywall?
To determine the best repair method, you should measure drywall hole sizes. Holes may vary in size, from tiny nail holes to large gaps that need reinforcement. Here is how to measure them accurately:
- Screws, nails or minor dents cause small holes (Up to ½-inch). You can measure with a ruler or estimate visually.
- Door handles, furniture impact, or accidental bumps commonly cause Medium Holes (1 to 4 inches). Use a measuring tape to determine the exact width.
- Large Holes (over 4 inches) may result from significant damage, such as electrical or plumbing work. Measure the width and the height to cut a correctly sized drywall patch.
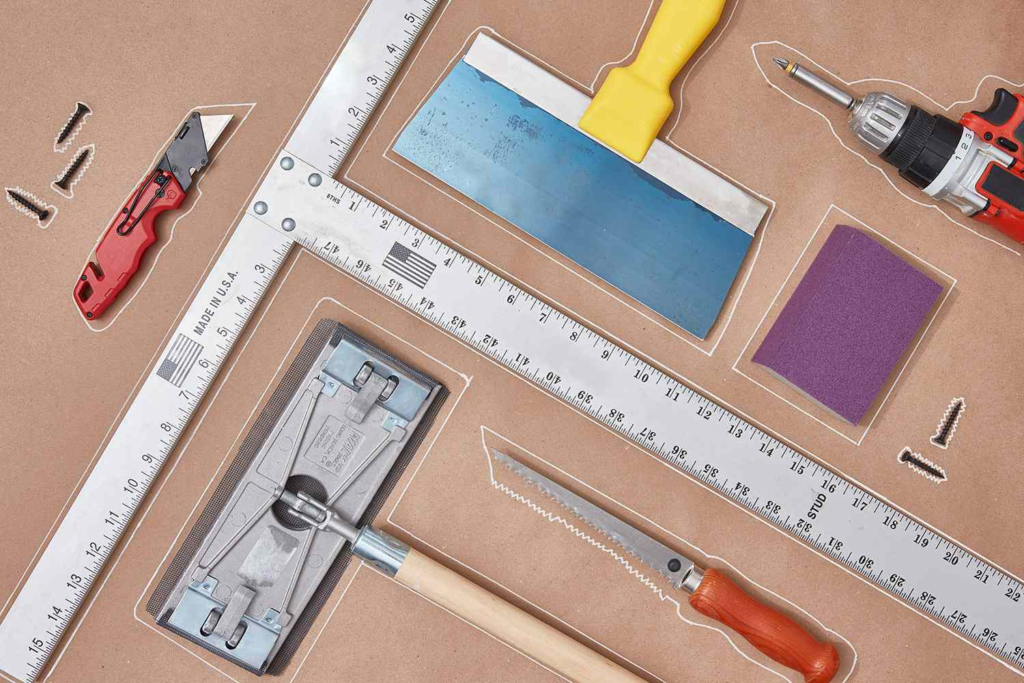
Arrange the Right Tools and Materials
Before patching drywall, you should have the right tools and materials for an efficient repair process. Here is what you’ll need based on the size of the hole:
- A utility knife to cut and clean the edges around the damaged area.
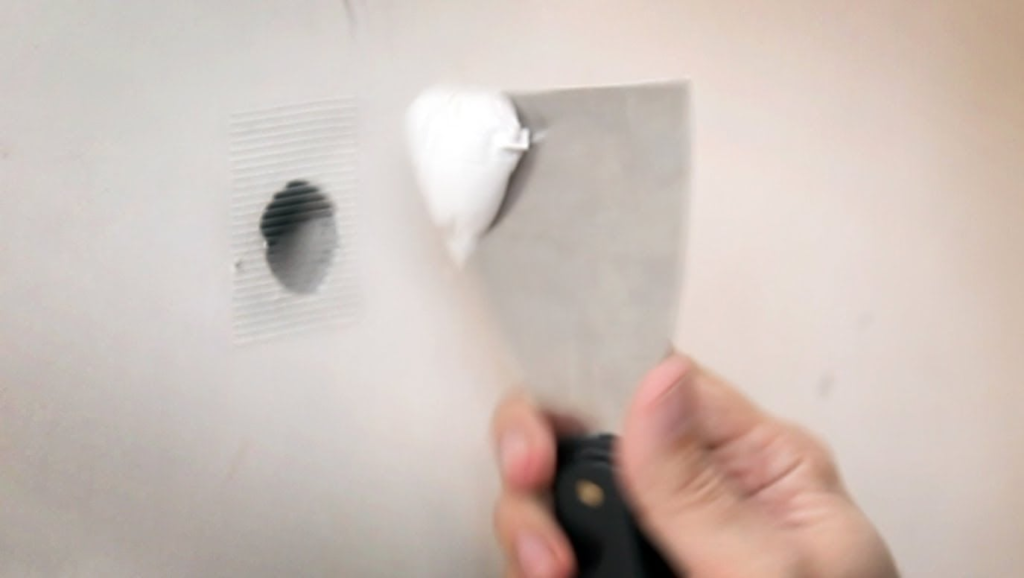
- Use a putty knife to smooth it and apply the joint compound.
- Get a sandpaper (120 to 220 Grit) to smooth the patched surface.
- How do you measure the hole? Of course, you need a measuring tape to measure the hole for accurate patching.
- Drywall saw for cutting larger damaged sections.
You need the following materials to patch holes in drywall:
If you want to patch small holes (up to ½ inch), you need:
- Lightweight joint compound or spackle
- Touch-up paint and primer
For medium holes up to 1 to 4 inches, you need:
- Joint compound
- Self-adhesive mesh patch
For large holes over 4 inches:
- Replacement piece or drywall patch
- Drywall tape (paper or mesh)
- Backing support, such as wood strips for reinforcement
If you have all the necessary tools and materials, you are ready to start the repair process. Make sure to arrange safety goggles and a dust mask for sanding and cutting.
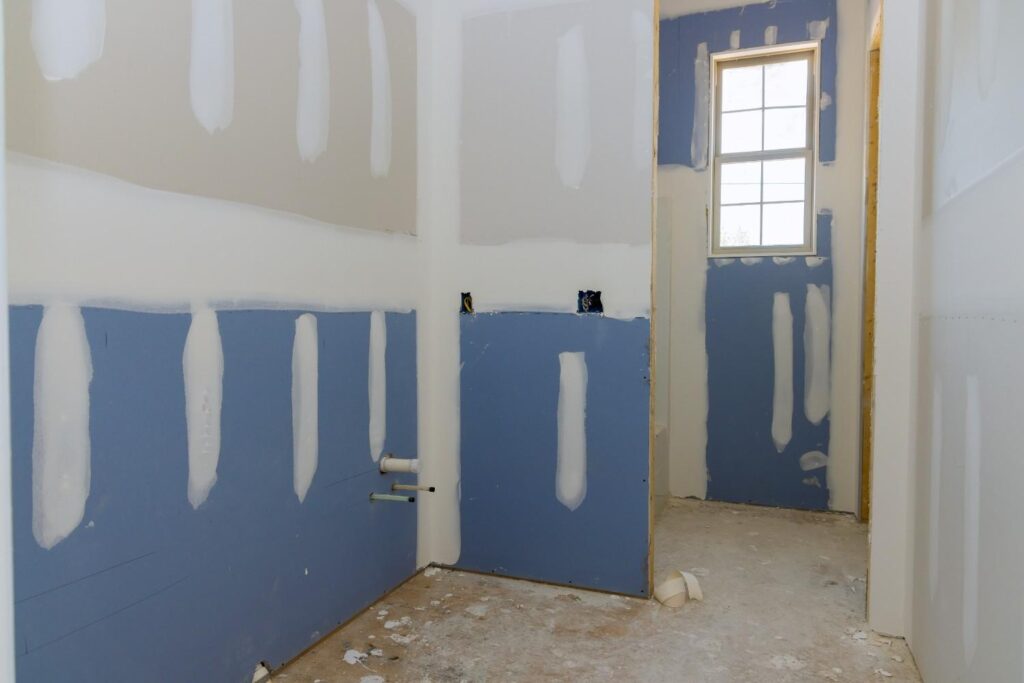
Step-by-Step Instructions for Patching Holes in Drywall
Put on your safety goggles and dust mask because you are ready to patch holes in your drywall. The procedure is simple, but it needs your attention.
Procedure to Patch Small Holes
You need a clean hole to start the procedure, so get rid of any dust or debris.
Using a putty knife, apply a lightweight joint compound or spackle. Smooth out the surface and let it dry for a few hours.
For a flawless finish, sand lightly, apply primer, and paint to blend the area with the wall. Wow, your small hole is beautifully patched.
Patch Medium Holes
It is a bit larger than a small hole. First, clean the area around the hole and then apply self-adhesive mesh tape over it. Why tape? It will give you the necessary support. Use a putty knife to spread joint compound over the tape. Feather the edges for a smooth transition and let it dry. This hole may require multiple layers to patch, so eventually, it will need more time to dry. Once dry, sand the patched area until smooth and apply primer and paint to this area.
Patch Large Holes
Use a drywall saw to cut the hole into a clean and even shape. Now, cut a piece of drywall to fit the hole. Secure backing support inside the hole. It could be wood strips. Attach the drywall patch to the backing with the help of screws.
Use drywall tape to cover seams and apply joint compound. Now you can apply additional layers if needed and sand between coats. Finish it by priming and painting the patched area. If you don’t have enough time to do all this, contact the best drywall contractors in Washington, DC.
How to make the patch disappear?
A flawless drywall repair is incomplete without a properly finished surface. Here are some tips for seamlessly blending the patch with the rest of the wall:
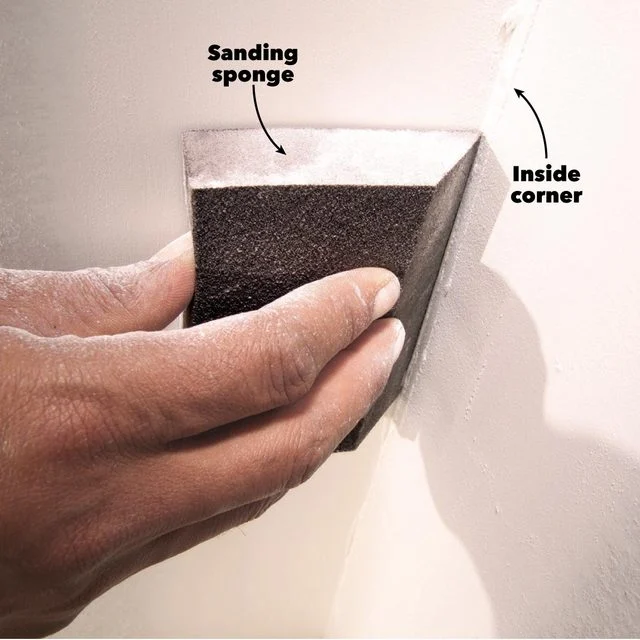
- Once the joint compound is completely dry, pay attention to sanding techniques for a smooth finish. Use fine-grit sandpaper (120 – 220 grit) to smooth the patched area.
- Pay attention to the sanding technique, such as sand in a circulation motion, feather the edges into the surrounding wall. This will help you avoid noticeable transitions. Use a pole sander or sanding block for large areas to maintain even pressure.
- Wipe off all dust with a vacuum attachment or a damp cloth before painting and priming. Remember, primer seals the patched surface for even paint absorption.
- With primer seals, you can prevent shiny or dull spots. Always choose a stain-blocking primer if your repair involves water damage or discoloration. Apply a thin, even coat of primer and let it dry completely before you start painting.
- Use the same brand and finish, such as matte, stain, or eggshell. You should choose the same color for a perfect color match. Apply paint using the same method, such as spray, roller, or brush, to maintain consistency in the sheen and texture.
- If your wall has a textured finish, such as orange peel, popcorn, or knockdown, you can go for a flat patch. Use a spray texture product designed to match the existing pattern. Practice on scrap cardboard before spraying the wall to get the technique right. Let the texture dry, then lightly sand and paint over it to blend thoroughly.
Watch Out for the Things You May Do Wrong
No doubt, patching drywall is a simple task. Still, some wrong steps can lead you to disastrous results. Here are some common mistakes to avoid:
- You can’t use excessive joint compound because it may cause ridges and lumps, ultimately increasing the drying times. It will also increase your sanding efforts, so keep it light and build up thin, even layers for a smoother finish.
- Patience is key when patching holes in drywall. Sanding or painting over a wet patch may result in uneven surfaces, peeling, or cracking. Let the compound dry completely between coats and before finishing.
- Is primer optional? No, primer is vital to create a sealed, uniform surface. Without it, paint can soak in unevenly, leaving visible discoloration or dull spots. So, go for a quick coat of primer to ensure the final paint layer looks professional.
- How do you feel if your repair stands out like a sore thumb? It can be frustrating. Right? So blend visible or sharp edges around a patch. You can use a feathering technique when applying compound and sand the area so it transitions smoothly into the surrounding wall.
Over to You
At first, patching drywall may seem daunting, but our guide can help you do it right. With the right techniques and material, it becomes a simple DIY job that you can tackle. This easy process will help you to patch a hole of any size. Start with smaller, less noticeable holes to practice and gain confidence in your repair skills. As you get more comfortable, you can tackle large holes. It will become easy and less intimidating. With time and practice, you can repair drywall like a pro. If you want professional services, you can contact our experts. EZ Remodeling offers affordable drywall installation services in Washington, DC.
Areas We Serve
WE PROVIDE SERVICES TO THE FOLLOWING CITIES, TOWNS AND SURROUNDING REGIONS OF WASHINGTON, DC AND MONTGOMERY COUNTY, MD
- Washington, DC
- Chevy Chase, MD
- Potomac, MD
- Bethesda, MD
- Rockville, MD
- Silver Spring, MD
- Gaithersburg, MD
- Germantown, MD
- Kensington, MD
- Clarksburg, MD
- White Oak, MD
- Wheaton, MD
- Aspen Hill, MD
- North Bethesda, MD
- North Potomac, MD
- Aspen Hill, MD
Main Office
- (202) 410-3632
- ezservice100@gmail.com
- 1314 14th street, NW, Washington, DC, 20005
Navigate
Location
© Copyright 2018-2026 | All rights reserved - EZ Remodeling Service, LLC.